 Objects Panel
Save your work often, because Dreamweaver can crash. It offers no autosave that I know of, so press Ctrl-S whenever you make a major change. If Dreamweaver locks up you still have something at saved.
If Dreamweaver says that your file was changed outside of Dreamweaver do you want to reload, you'll likely loose changes. So just say no.
 Objects Panel
If you go to Window on the menu, the first few items will turn on or off the floating windows. You can drag these windows to suit your needs.
Right click the page and select Page Properties. From here you can change the title of the page. Once you title it, save it. This way when you insert media files, Dreamweaver will know the path of the data relative to your HTML file.
Selecting an item, such as text allows you to change it's properties. You can look at the Properties Inspector to adjust it's value, such as bold, italic, center, etc. However of underline, you need to go to Text, Style, Underline.
The Properties Inspector will change based on what's selected, such as an image will give you image properties.
If you want to remove a property of something, go to it's properties and uncheck it.
If you want to see what HTML code is used for what parts of your page, you can use the HTML Code Inspector. Select something in the document and the HTML Code Inspector will show you the HTML tags used.
Type in Dreamweaver like you use a word processor. However for extra spaces, you will need to use a special space character from the Object Panel. Tabs will need you to press an indent option on the Properties Inspector.
The Objects Panel allows you to insert images, tables, forms, and other content to your site.
Select the Common elements, then select Image. Or you can do Insert, Image from the menu bar. Select your image and it will be inserted where you cursor is. To resize an image proportionally, click the bottom right corner of the image, hold down the shift key and drag the mouse to scale it. If you want it not to scale, then you can drag any corner without the shift key.
Image Properties
Click the image to see the original
You can see the various ways of wrapping text. Bottom
You can see the various ways of wrapping text. Middle
You can see the various ways of wrapping text. Text Top
You can see the various ways of wrapping text. Right
It's easiest to place a few blank lines and then do the formatting, or go to the end the page and press enter a few times to break out of the special formatting.
You can set a border around an image.
Text Properties
Links:
Highlight the text or image you want as the link and then in the properties set a link address or click browse to select a file.
For Mailing links, select Insert, E-mail Link
You can select justification to set a position of text.
Left
Center
Right
Page properties will set the colors of the links, text, background, a even set background image.
Meta Tags
These are used by search engines to get a description of the site and key words.
Select Head from the Objects Panel. Select Insert Keywords and fill in keywords separated by commas. Then select Insert Description and fill in a description. If you want to see what you inserted, view the HTML code and look at the HEAD.
Head Tags. In Dreamweaver, move the mouse over the icons to see what's what.
Check your spelling. Press Shift-F7 or Text, Check Spelling.
List:
To do a list, you can select from the text properties or by going to Text, List.
Tables:
In the Objects Panel, select Common, Table. Select some number of rows and columns.
Hello Class Select a cell and then you can select it's background color (bg). You can write in a cell and insert anything just like the rest of the document. No fixed size is auto size to fit content inserted.
Table Properties
Image Maps
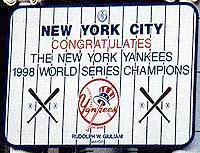
Select an image by highlighting it. Give the Map a name. Then select from a section tool on the bottom right of the image properties. You can drag over an area you want to make a hyperlink. You can select the arrow tool to move the area or resize the area. To set a URL for the area, select the section then in the properties give the link address. Such as in the example below, if you click on the Yankee's logo it will take you to the Yankee's website. Note that you can see that it's a hyperlink, because the mouse pointer will turn to a little hand symbol and in the status bar the URL appears.

Image Properties
Good Luck!