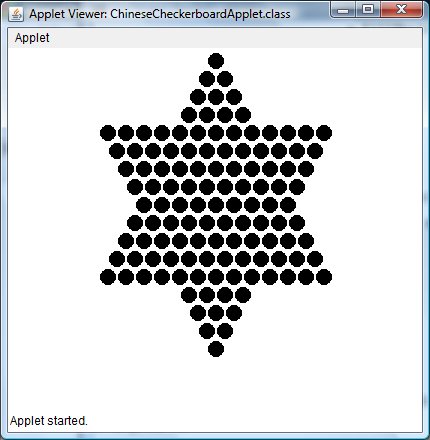
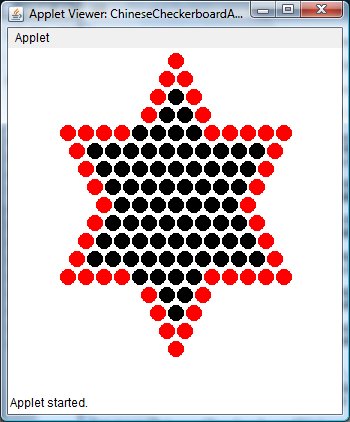
First, however, we present a plain Chinese checkerboard:
Here is the source code.
This is quite a bit more involved than a simple checerkboard in that it is not quite as symmetric. Many of the techniques shown are useful in the more general context of drawing images, so make sure you understand its code.
When implementing the app, don't worry about size or position relative to the app's window(i.e., you don't have to worry about getting the size or position of the drawn elements exactly the same as mine-- what I'm interested is their relative placement within the app).
Here is the source for checkboard without the pieces..
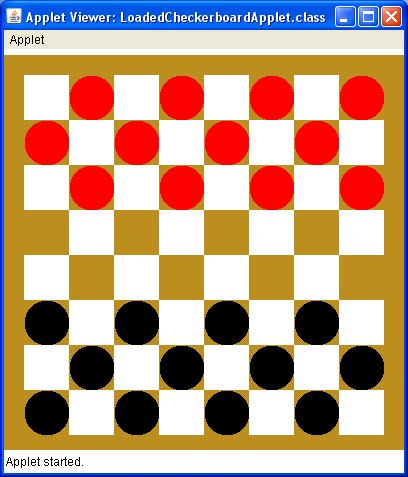
This one is fairly straightforward- simply take the checkerboard code and add the circles according to the pattern shown in the image.
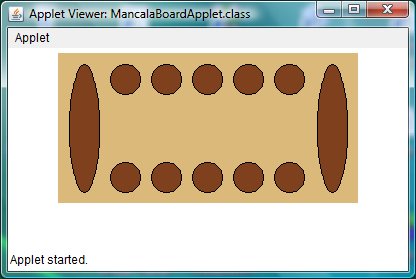
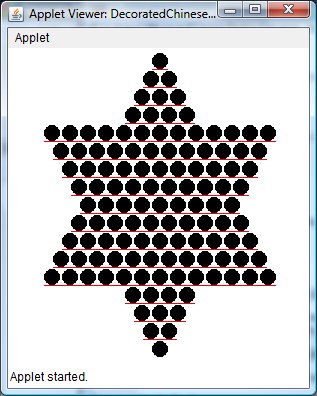
Mancala is an ancient African game played with pits and stones. This app displays the empty Mancala board. Notice the symmetry of the board-- the spacings and rows of smaller pits flanked by the larger pits.
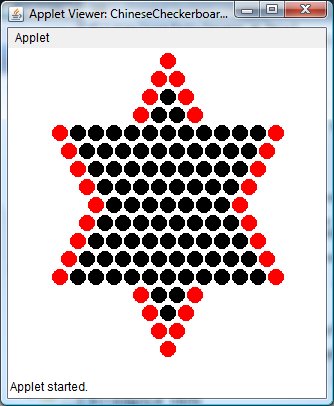
In this board, the vertical edges are colored red. The logic to achieve that is not all that hard.
If you did the loaded checkerboard, this one should be a cinch (it also involves code similar to the solved Chinese checkerboard at the top of the lab), and if so, you'd be done-- see, it IS possible to do this lab. But now that you know there's a light at the end of the tunnel, I'm hoping you'll try some of the more challenging ones.
This one requires you to draw lines in the spacing gap between the rows-- I went halfway in the gap. Again, not too bad-- much harder would be to draw diagonal lines.
This one is a bit nasty-- don't even bother trying it until you've done #1 in this sequence. You COULD conceivable
set up an array of Color objects for each row with an entry for each hole in the row stating its color
(black or red), but that's painful and doesn't scale well (imagine a HUGE board of thousands of rows). The problem is how to
determine which ones should be painted red? (Hint-- the red ones are those not surrounded on all sides by other holes.)
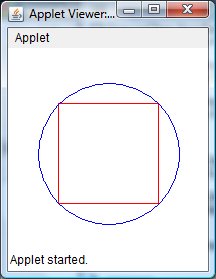
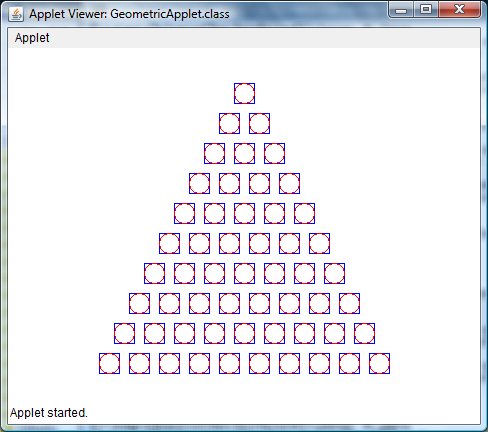
This one is quite a bit harder than #1. Placing a circle in a square is a snap (that's what you did in #1 and the loaded checkerboard)-- going in the other direction-- a square in a circle is a whole different ballgame. You'll need a bit of geometry as well as the Pythagorean Theorem (remember that?-- the formula for a hypotenuse?) Sit down with some paper and go to work-- draw the square in the circle. Remember that the circle is drawn by specifying an outer square (like the one in #1 or the Loaded Checkerboard). See if you can figure out the relationship between the inner and outer square.
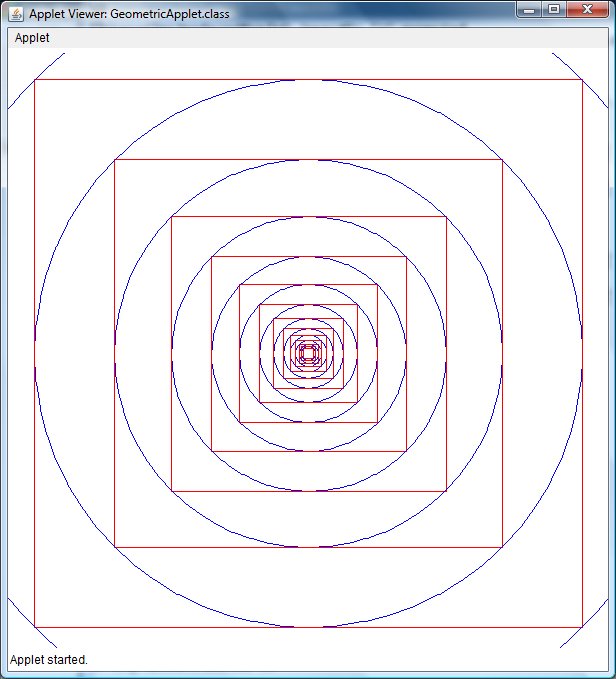
If you were able to do #2 congratulations-- and this one is simply putting it into a loop that draws the square outside the circle, and repeats the whole process.
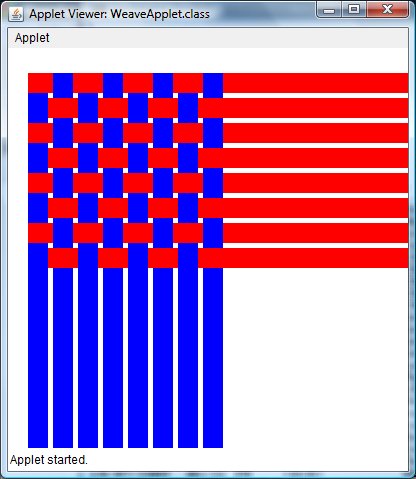
While it's hypnotically beautiful, try this and you'll start ripping your hair out. Some hints-- how do those unwoven strips get there?... also, think of the checkerboard-- go back and make a red and blue checkerboard and then-- MIND THE GAP!