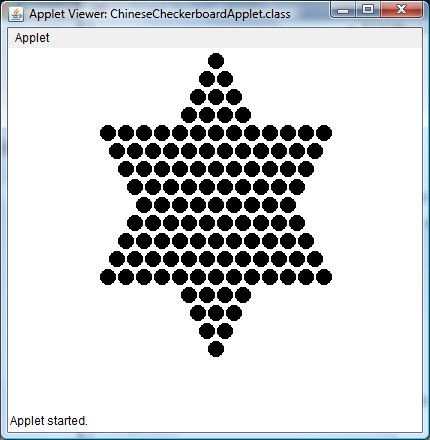
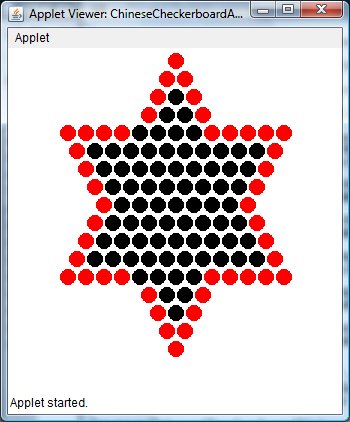
First, however, we present a plain Chinese checkerboard:
Here is the source.
This is quite a bit more involved than a simple checerkboard in that it is not quite as symmetric. Many of the techniques shown are useful in the more general context of drawing images, so make sure you understand its code.
import java.applet.*;
import java.awt.*;
import java.awt.event.*;

public class ChineseCheckerboardApplet extends Applet {
	public void init() {
		add(new ChineseCheckerboard(this));
	}
}

class ChineseCheckerboard extends Canvas {
    public ChineseCheckerboard(Applet parentApplet) {
        setSize(600, 600);
    }

    /*******************
    We'll have an array, holesInRow, that contains the number of holes per row of the board--
    the first row contains 1 hole, the second 2, the third, 3 (see below).

    We define a utility function drawRow that accepts as its paramter which row to draw
    (as well as the Graphics object sent to paint so we can call our drawing methods).
    *****************/

    public void paint(Graphics g) {
        for (int i = 0; i < holesInRow.length; i++)
            drawRow(g, i);
    }

    /*******
    drawRow figures out the (horizontal) center of the display, the width of the current row (from the number
    of holes in that row, their size and the spacing gap). It then calculates the starting horizintal position
    by subtracting half of the row width from the center position, so that half of the row will be displayed on
    one side, and the other half on the other. The vertical position remains fixed for the entire row.
    *******/

    void drawRow(Graphics g, int row) {
        int centerX = getWidth() / 2;           // figure out center of display
        int startY = 0;
        int numHoles = holesInRow[row];
        int rowWidth = numHoles * holeDiam + (numHoles-1) * holeGap;    //row width is number of holes + appropriate number of spacings
        int startX = centerX - rowWidth / 2;            // Starting horizontal position is centerX less half the row width
        int y = startY + row * (holeDiam + holeGap);    // Vertically position based upon which row you're displaying
        g.setColor(Color.BLACK);
        for (int i = 0; i < numHoles; i++) {            // Draw each hole
            g.fillOval(startX + i * (holeDiam + holeGap), y, holeDiam, holeDiam);
            g.drawOval(startX + i * (holeDiam + holeGap), y, holeDiam, holeDiam);
        }
    }

    final int holeDiam = 15;
    final int holeGap = (int)(holeDiam * 0.25);

    // Here's the array containing the number of holes per row

    int [] holesInRow = {1, 2, 3, 4, 13, 12, 11, 10, 9, 10, 11, 12, 13, 4, 3, 2, 1};
}
When implementing the applet, don't worry about size or position relative to the applet's window(i.e., you don't have to worry about getting the size or position of the drawn elements exactly the same as mine-- what I'm interested is their relative placement within the applet). I happened to use a Canvas in all cases (as you can see with the Checkerboard and ChineseCheckerboard applets)-- it just proved convenient but if you want to you could do the painting directly onm the applet's surface instead.
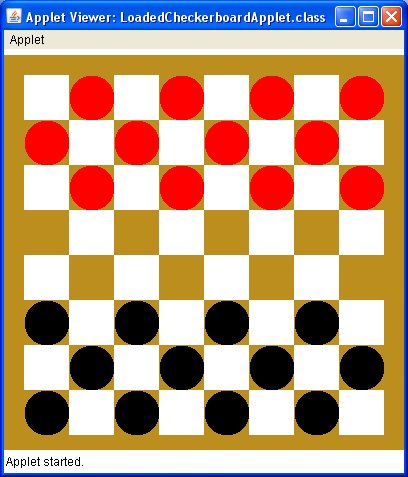
This one is fairly straightforward- simply take the checkerboard we poresented in class and add the appropriate circles by
adding a fillOval to the paint method. Of course, in order to get the right pattern, you can't
invoke fillOval for every square-- and you've got to distinguish betwween the squares that have red checkers
and those that have brown checkers.
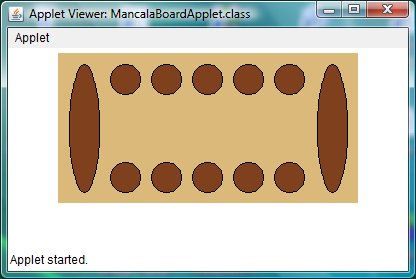
Mancala is an ancient African game plaed with pits and stones. This applet displays the empty Mancala board. Notice the symmetry of the board-- the spacings and rows of smaller pits flanked by the larger pits.

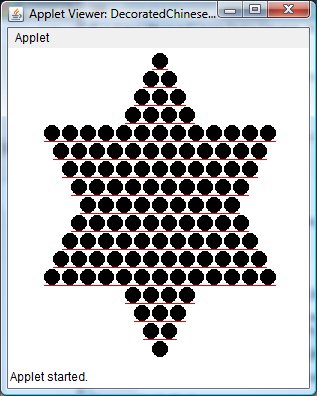
In this board, the vertical edges are colored red. The logic to achieve that is not all that hard.
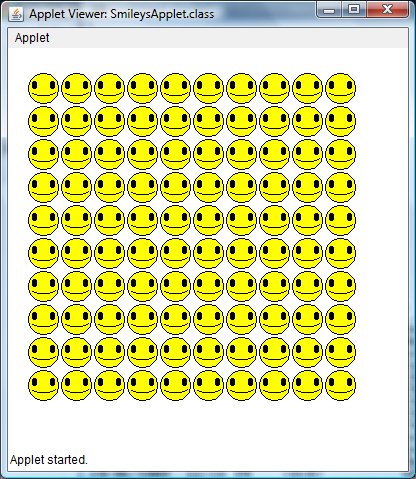
While you might not have anything to smile about by this point, these little guys do. To get them you should
first solve the problem of drawing a SINGLE smiley and make that into a method that can be passed a position (x, y).
paint can then use one or more loops to call your smiley method with different positions.
The smiley itself is a circle for the head, a pair of well-placed ovals for the eyes (taller than wide), and an
arc for the mouth. Look at drawArc in the Graphics class' API-
if you can't figure it out, either ask me, or use a circle/oval for the mout-- but if you do don't forget to
call it Laughy instead :)
If you did the loaded checkerboard, this one should be a cinch (it also involves code similar to the solved Chinese checkerboard at the top of the lab), and if so, you'd be done-- see, it IS possible to do this lab. But now that you know there's a light at the end of the tunnel, I'm hoping you'll try some of the more challenging ones.
This one requires you to draw lines in the spacing gap between the rows-- I went halfway in the gap. Again, not too bad-- much harder would be to draw diagonal lines.
This one is a bit nasty-- don't even bother trying it until you've done #1 in this sequence. You COULD conceivable
set up an array of Color objects for each row with an entry for each hole in the row stating its color
(black or red), but that's painful and doesn't scale well (imagine a HUGE board of thousands of rows). The problem is how to
determine which ones should be painted red? (Hint-- the red ones are those not surrounded on all sides by other holes.)
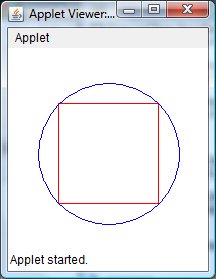
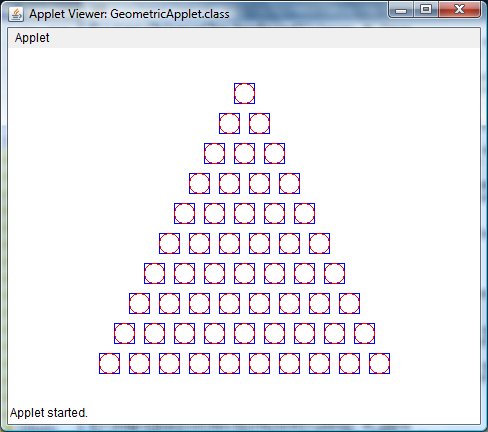
This one is quite a bit harder than #1. Placing a circle in a square is a snap (that's what you did in #1 and the loaded checkerboard)-- going in the other direction-- a square in a circle is a whole different ballgame. You'll need a bit of geometry as well as the Pythagorean Theorem (remember that?-- the formula for a hypotenuse?) Sit down with some paper and go to work-- draw the square in the circle. Remember that the circle is drawn by specifying an outer square (like the one in #1 or the Loaded Checkerboard). See if you can figure out the relationship between the inner and outer square.
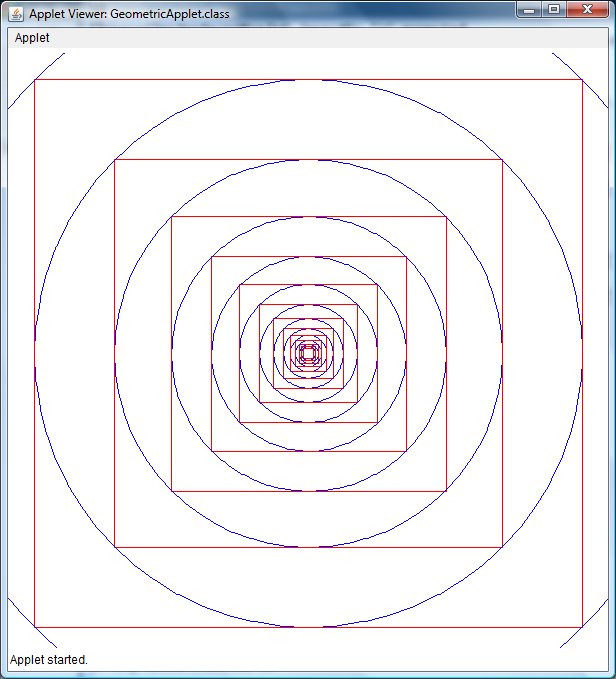
If you were able to do #2 congratulations-- and this one is simply putting it into a loop that draws the square outside the circle, and repeats the whole process.
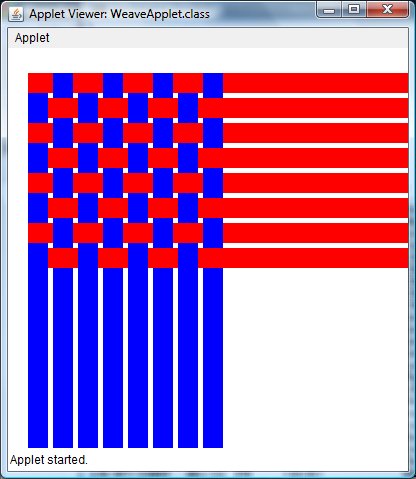
While it's hypnotically beautiful, try this and you'll start ripping your hair out. Some hints-- how did those unwoven strips get there?... also, think of the checkerboard-- go back and make a red and blue checkerboard and then-- MIND THE GAP!
private directory).