Prof. Dayton Clark - dayton@sci.brooklyn.cuny.edu
Lawrence Goetz - goetz@lawrencegoetz.com
Project Web Site:
http://www.sci.brooklyn.cuny.edu/~pinball/
Project Feedback:
http://www.sci.brooklyn.cuny.edu/~pinball/feedback.html
Introduction:
The Pinball Player Project is a computer system setup to play pinball.
It is mainly written in Java, except for the camera driver (which is written
in the C language). Using a QuickCam
camera, the computer is able to see what is going on in the game. Presently
a grayscale parallel port camera is being used. The computer controls the
pinball machine via a data acquisition device and OnTrack
ADR2200.
The goal of the system is to allow students to work on a real-time system
that is inexpensive and easy to use and setup. This will be an educational
tool for students to develop real-time programs that will interact with
the pinball machine and camera. For beginning courses, students can deal
with how to interact with the pinball machine's flippers and sensors, time-critical
responses and simple strategies. For more advanced courses, they can add
to the controls of the system, try to play for higher scores, aiming for
targets, and network play. There is also an engineering aspect involved.
The students can tap into built in sensors of the pinball machine. For
example, the bumpers and targets in the game. This will allow the student
to figure out which targets are already knocked down and which need to
be aimed for.
If you have a QuickCam and want to test the system without a pinball machine, you can. There is a special player called draw. The draw player can track the right hand movement of a person. The person can touch two rectangles on the screen. When the player touches these rectangles, the rectangles change color. If you do use the draw player, or any player and you do not have a Digital IO Module attached, the program will hang at exit. This is because it is waiting for the system to shut down any solenoids in the pinball machine that may be on. To overcome this, edit the ADR2200.java file in pinball/io and change the variable deviceConnnected to be equal to false.
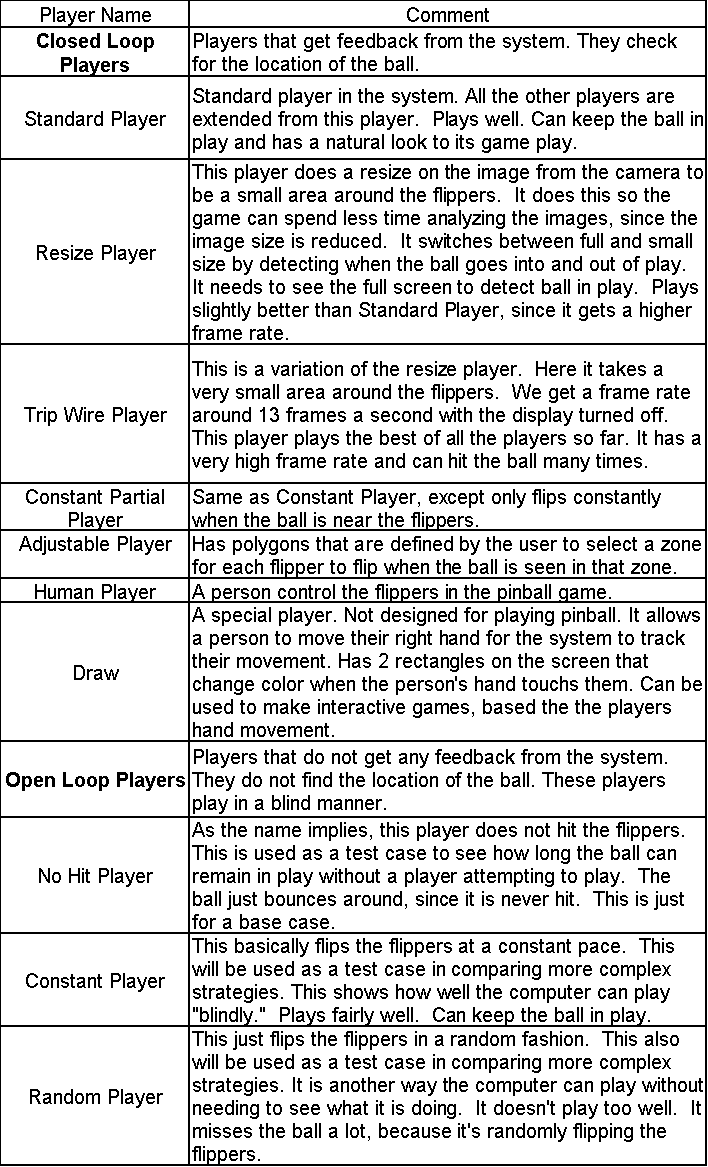
Players in the System:
Starting the Program:
For the camera driver to work, and thereby the whole system working, you need to be root for the system to be in local or server mode. Client mode does not use the camera and can run by any user.
For the program to be started, a player needs to be defined. The player code starts the program. The player can be in three modes, with the mode defined by the command line argument supplied. The default mode is local, where the player is playing locally to the system. Server mode means the player is setup to transmit commands over the network. Client mode means the player plays remotely and responds to commands from the server. The command line arguments are -S for server, -C for client. There is no command line argument for local mode.
To startup a player, one does the following:
Go into the root directory containing the pinball packages. Then do:
$ java pinball.player.PLAYER_PACKAGE.PLAYER
Replace PLAYER_PACKAGE with the package that contains the player class.
Replace PLAYER with the player class.
The player starts the program in the mode in which it is to play. Then the program creates the main menu and waits for the user to enter values. Before the program is started, the user can choose to record a game or play back an existing game.
The recording of a game will record the images and actions performed by the program. The game being played back is not able to be edited. New actions performed during playback will have no effect on the outcome of the game. This does not show how a different strategy would play the game as a whole, but rather how it would play at various instances during the game.
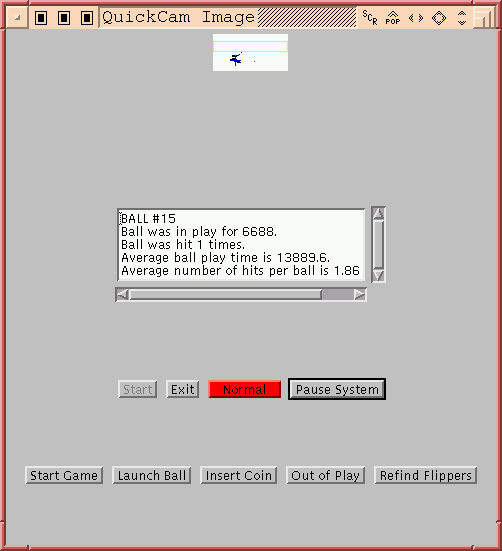
To record a log file, a command line argument is used for recording the events that take place within the game. -l will record events only. -L will record both the events and the images from the camera.. -lpath or -Lpath will setup the log file under the path given. The path is the location to store the log files. You must end the path with a `/', or the location will not be correct. The file name of the log is a special code based on the date, time, player, display status, and ball number. The log keeps track of such items as, objects found, flipper status, ball location, why objects found are rejected as a ball, number of hits, time in play, average time in play, average hits.
Also, there is a flipper file that stores the locations of the flippers. If someone does not want to have the program find the flippers again, they can use previous locations. This is useful if someone needs to restart the program shortly after exiting. However, it they use an old flipper file, the lighting conditions in the room may have changed and the locations of the flippers might not be valid any more. So it is best to use this feature only if the locations found are recent. To use a flipper file the command line argument is -Ffilename, where filename is the name of the flipper locations file. If the file is found, the system reads the locations. If the file does not exist, the flipper locations are found and are stored to that file.
For the player Adjustable, there is an extra command line option available. If you wish to have the polygon saved or loaded, you may use the command -Pfilename to specify the file used to store the flipper's locations.
Some customization settings can be found in the GameOptions class. Particular is the location of the serial port. You'll also find threshold settings, and other system preferences.
If the camera driver hangs when you attempt to start the system, make sure the printer port is set to bi-directional.
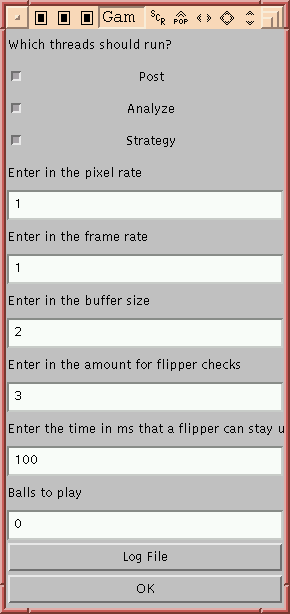
When the system starts up, an options screen is displayed. This allows you to set various parameters for the system. Most should be self explanatory. One which needs explanation is Balls to Play. That setups up the number of balls for the system play before exiting. Setting it to 0 will let the system play until the user presses Exit. A positive value will let the system play that number of balls. This is useful for when the system will be taking statistics for a set number of balls. If you want to have the system play back from a log file, press the Log File button and select a previous log. The system starts with that log file and goes to the remaining log files for that game. The system will exit when it gets to the last log file for that game.
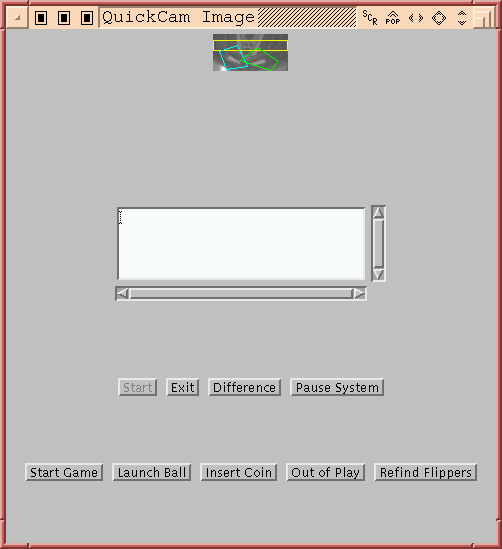
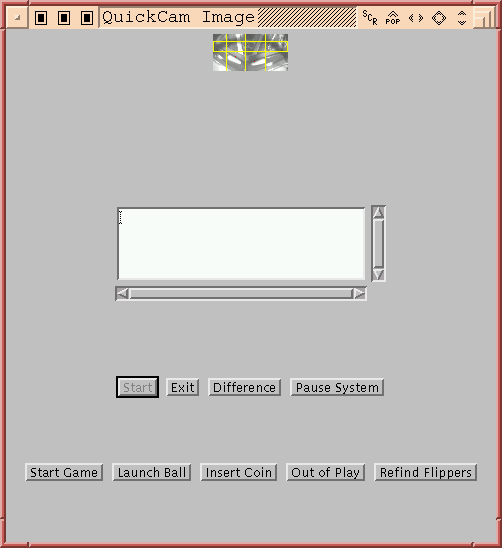
When the system is ready to start, the main menu screen appears:
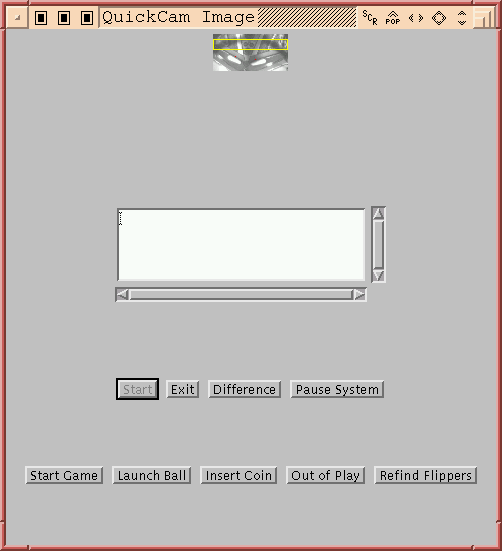
To start the system, press Start. To exit, press Exit.
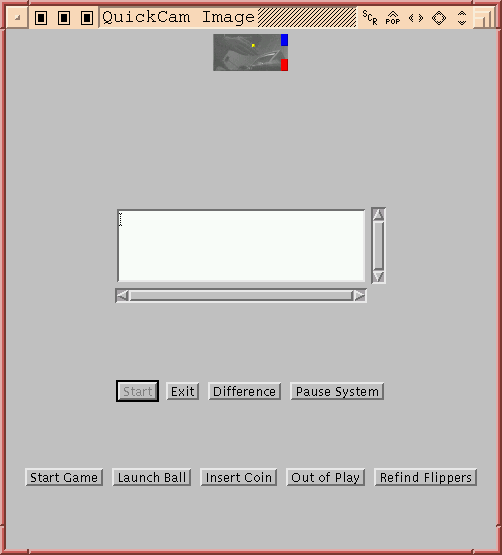
Here is what the system looks like in the Difference display mode:
For the adjustable player, there are a extra commands in the system
to define the zone for the flippers:
An additional command line argument is available for this player:
-Pfile is used to store the locations of the polygons for the flippers.
While the system is running, on the keyboard press 1 or 2 to select
the left or right player. Then click on the window to define the outline
points of the zone for that flipper. If you want to delete the outline,
press d. If you want to save the outlines, press s. The file specified
by the command line argument will automatically load previous outlines,
if they exist, and will save to that file name, if save is chosen.
Here is a picture of the Adjustable Player:
The HoldHotSpot draws lines on the screen to represent the hot spots:
The long box in the center is the hit counting zone. It is the same
for all players. The middle vertical line is the middle of the flippers.
The other vertical lines represent the edges of the flippers. A ball seen
between the edge of the flipper and the middle of the flippers will cause
the flipper to flip. A ball to the extremes of the edge of the flipper
will cause the flipper to be held up as long as the ball is moving.
Human player creates a window that shows the image of from the pinball
machine. Place the mouse over this window so you can control the flippers.
The left flipper key is Z and the right flipper key is /.
Draw player allows a person to move their right hand to control objects
on the screen. There are two rectangles that when touched change color.
The system takes any movement to the right of the screen to be the person's
right hand. So the background of the room should not have things moving.
Standing in front of a wall helps.
Here is the Draw player. You move your right hand to touch the rectangles. When you touch them, they change color.
Some new players have been made:
Since Java is object-oriented, it allows for various changes to go on while still preserving the original design. Our system is designed modularly and various parts are replaceable. Experiments in various tasks are outlined below:
Laser Pointer Mouse: Using
a common pen laser pointer, a user is able to control the mouse pointer.
The camera is fitted with a red filter over its lens. The user points
the laser pointer on a white wall. The lens blocks out all the other
light, except for the laser pointer. Since the camera does not see
color, the laser point appears as a white light. Movement does not
come into play with the analysis. The computer while analyzing the
image looks for pixels that are pure white in a
single frame. The mouse pointer on the computer is moved to reflect
the position of the laser pointer in the frame. Clicking the laser pointer
on and off was the original idea for clicking the mouse. However
the computer would miss seeing the light periodically and would create
extra mouse clicks. To prevent this, we hold a computer mouse and
used its mouse buttons instead.
Hand Interaction: We modified
the analysis part to track a person?s right hand. The analysis finds
the furthest change in the right hand part of the image. With a static
background, this would be the person?s right hand. The display inverts
the image, so that a person sees their mirror image. With the system
able to track a person?s right hand, someone could interact with the display.
A simple interaction was chosen: touch the squares. There are two
squares on the display
that when a user reached up and touches them, the squares change color.
Robot: We have connected
an OWI Incorporated Movit Soccer Robot to the I/O board. The system
sees the robot moving and can track its progressive movement. As
a simple test, we set the system to detect if the robot is making any progress
moving. We do not detect the possibility of a collision, only that
a collision has occurred. The robot has a fence that prevents it
from going of bounds. When the robot hits the fence, it is stopped
from making any progress in its current
direction. When the system detects this, its movement is reversed.
The robot store carries them. Link
to product.
Morse Code Conversion:
We
hooked up a light to the I/O board so the computer could send Morse code
light pulses. Using the camera we can detect when the light is being
transmitted. The computer then reassembled the dots and dashes as
characters and displays the message sent. The Morse Code program
uses the same analysis code that the laser pointer uses; it detects white
light without movement. With the room lights dimmed, the Morse code
light becomes pure
white and is the only object found in the frame.
To create a statistics file based on the log file, you can use the
LogAnalyzer.
You can it by doing:
$ java pinball.log.LogAnalyzer logFile output
Replace logFile with the name of the first log file.
Replace output with the name of the output.html file you want
to use. The log analyzer will tack on the html extension automatically.
After running the analyzer, you can open up the html file in your browser to see the charts. You need to have the images directory in the root of the directory that you have your html file.